Stop scrolling through expensive video editing software tutorials. OpenArt just made professional AI video creation ridiculously simple—and you don't need a film degree to use it.
Creating AI videos with OpenArt gives you access to powerful generation models such as Sora 2, Veo3, MiniMax Hailuo, and Kling 2.1—all in one platform. Each model handles different video styles, from photorealistic footage to cinematic storytelling, so you're never locked into one aesthetic.
Content creators, marketers, and complete beginners can now generate cinematic videos, animate static images, and edit footage with AI-powered tools that do the heavy lifting for you.
This tutorial breaks down everything from text-to-video generation to advanced editing features.
What Makes OpenArt Different from Other AI Video Generators
Most AI video tools lock you into one model or style. OpenArt gives you four powerful video generation engines in one platform:

But OpenArt doesn't stop at video generation. The platform includes a complete editing suite with motion-sync, lip-sync, sound effect generation, video upscaling, and timeline editing—all powered by AI.
Getting Started: Account Setup and Credits

Creating an OpenArt account takes less than two minutes. Head to the OpenArt website, sign up, and you'll receive trial credits to explore the video features.

Here's the straight talk: video creation requires credits. The trial credits let you test different models and features, but ongoing video production needs a paid plan. Think of it like a coffee subscription—trial cup first, then pick your plan based on how much you create.

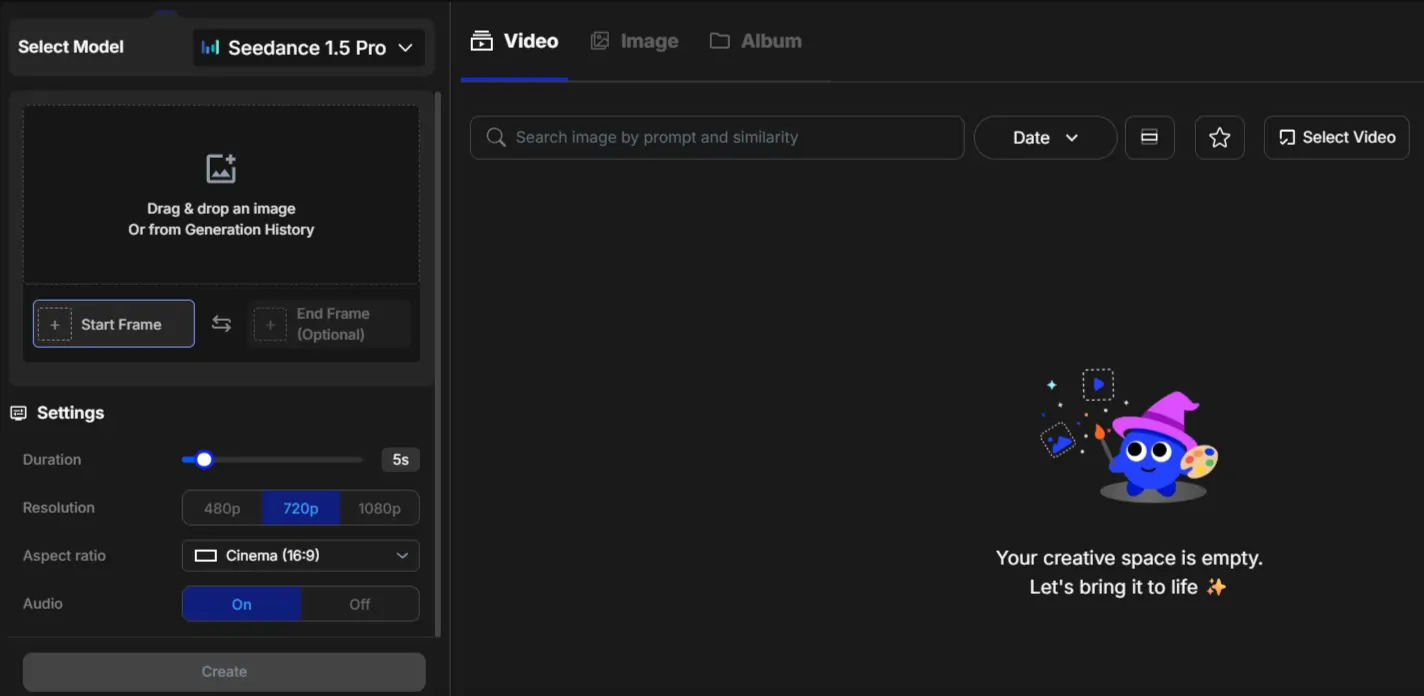
Once logged in, navigate to the Video Tools section from the main dashboard. You'll see options for text-to-video, image-to-video, elements-to-video, and video editing tools.
Text-to-Video: Generate Videos from Descriptions
This is where the magic starts. Text-to-video turns written descriptions into fully-rendered video clips.
Step-by-Step Process:

- Click “Text to Video” from the video tools menu
- Write your scene description (be specific about actions, environment, and style)
- Select your AI model—Sora 2 for realism, Veo3 for storytelling, MiniMax for detail, or Kling 2.1 for nature
- Set video duration and aspect ratio (16:9 for YouTube, 9:16 for TikTok/Instagram)
- Hit generate and wait 2-5 minutes
- Preview, download, or edit further
Prompt Writing Tips:
Forget vague descriptions. “A dog running” won't cut it. Try “Golden retriever sprinting through a sunlit meadow at sunset, slow motion, cinematic lighting, shallow depth of field.”
Include three key elements: subject (what/who), action (doing what), and style (how it looks). Add environmental details like lighting, weather, and camera angles for better results.
Image-to-Video: Bring Static Images to Life
Already have photos or AI-generated images? The image-to-video converter adds motion and transitions to static visuals.
This feature shines for product photography, turning catalog images into dynamic ads. It also works brilliantly for animating concept art, memes, or social media graphics.
How It Works:
- Select “Image to Video” from the tools section
- Upload your reference image (photos, illustrations, AI art—anything works)
- Describe the motion you want (“camera slowly zooms in” or “subject turns head left”)
- Choose the video model that matches your image style
- Configure video length and format
- Generate and download
Advanced Creation: Elements-to-Video and Video-to-Video

Professional Editing Tools Built Right In
OpenArt's editing suite separates it from basic video generators. Here's what you get:
Motion-Sync Video: Adds realistic, natural movements to static elements. Great for making characters or objects move convincingly within scenes.
Lip-Sync Video: Syncs character lips perfectly with voiceovers or dialogue. Create talking head videos or spokesperson content without filming actual people.

Sound Effects Generation: AI adds cinematic sound effects that match your video's visual tone. Footsteps, ambient noise, action sounds—all generated automatically.
Video Upscale: Boost resolution and visual clarity. Turn decent footage into professional-grade output with enhanced details.
Video Editor with Timeline: Full timeline control for multi-clip sequences, transitions, and precise editing. Build complete stories from multiple generated clips.
Extend Video: Generate creative variations or extend video duration naturally. Keep narratives flowing without awkward cuts.
Character Features and Replacements
The Replace Character tool lets you swap characters in existing videos while maintaining scene consistency. Film once, create infinite variations with different characters—perfect for testing different demographics in ads or creating character alternatives.
Note: Character Creation (for maintaining consistent characters across multiple projects) is a premium feature. It's worth it if you're building serialized content or branded characters.
How to Optimize AI Videos with OpenArt for Each Platform
Common Problems and Quick Fixes

- Blurry or low-quality output? Run it through the video upscale tool. If that doesn't fix it, regenerate using a different model—sometimes Sora 2 delivers sharper results than Veo3 for certain subjects.
- Weird, unnatural movements? Refine your motion description. Be more specific about speed, direction, and style. Use motion-sync as a second pass to smooth things out.
- Style doesn't match across clips? Stick to one model per project. Each AI model has a distinct visual signature. Mixing them creates inconsistent aesthetics.
OpenArt vs the Competition
| Feature | OpenArt | Runway | Pika | Stability AI |
|---|---|---|---|---|
| Multiple AI Models | ✅ More than 8 | ❌ 1-2 | ❌ 1 | ❌ 1 |
| Built-in Editor | ✅ Full suite | ✅ Yes | Basic | Basic |
| Lip-Sync | ✅ | ✅ | ❌ | ❌ |
| Sound Effects AI | ✅ | Limited | ❌ | ❌ |
| Character Replace | ✅ | Limited | ❌ | ❌ |
| Upscaling | ✅ | ✅ | ✅ | ✅ |
The multi-model approach gives OpenArt serious flexibility. You're not locked into one style or stuck buying multiple subscriptions.
What Can You Actually Create?
Your Next Steps
Start simple. Pick one creation method—text-to-video is easiest for beginners—and generate 5-10 clips using different prompts and models. See which model's style matches your content vibe.
Test image-to-video with photos you already have. Turn product shots, selfies, or screenshots into motion content.
Once comfortable with basic generation, experiment with the editing tools. Motion-sync and sound effects add polish that makes amateur footage look professional.
OpenArt gives you four pro-level AI video models plus a complete editing suite in one platform. Most creators spend hundreds monthly cobbling together different tools. This consolidates everything.
The learning curve? Maybe an hour to feel confident. The creative possibilities? Genuinely endless.
Stop overthinking it. Open OpenArt, type a description, and watch your idea become a video. That's literally all it takes to start.
AiMojo Recommends:


 BONUS: Get our $200 “AI Mastery Toolkit” FREE when you sign up!